How to download pictures from digital camera: USB, card reader, and Wi-Fi
Getting your photos off your camera and onto your computer shouldn't feel like a chore. The best way to do it really just boils down to what you care about most in the moment: sticking with a USB cable is the simplest route, using an SD card reader gets you the fastest speeds, and your camera's built-in Wi-Fi offers pure wireless convenience.
Each method is pretty straightforward, and once you get the hang of it, you'll have a go-to workflow for getting your memories safely onto your computer.
Your Guide to Downloading Camera Photos
Moving those images from your camera to a computer or phone is the first real step before you can edit, share, and properly back them up. While the process itself is easy, the best approach changes depending on the situation.
Think about it this way: a professional photographer coming home from a wedding with thousands of massive RAW files needs the blazing-fast transfer speeds of a dedicated SD card reader. On the other hand, if you're on vacation and just want to post a few great shots to Instagram, the cable-free ease of a Wi-Fi connection is perfect.
This guide will walk you through the most common and effective methods, helping you figure out what works for you. It's also a good idea to understand the basics of secure data transfer methods in general, just to make sure your digital files are always handled safely from point A to point B.
Choosing the Right Download Method
Not sure which path to take? Just think about your main goal. This little decision tree breaks it down based on whether you're prioritizing speed, convenience, or just keeping things simple.
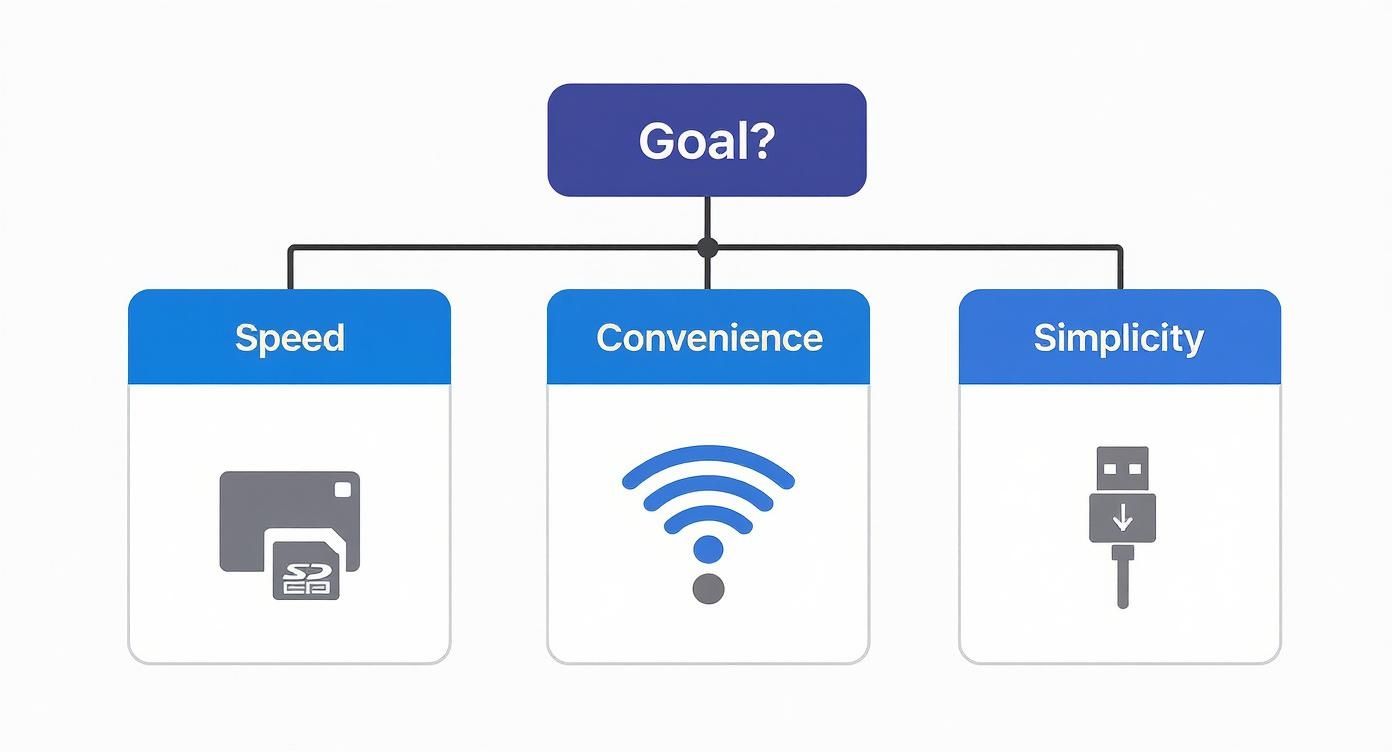
As you can see, there isn't one "best" way to do it—the right choice is all about what you need right now.
To make things even clearer, I’ve put together a quick comparison table. It gives you an at-a-glance look at the most popular ways to get photos off your camera so you can pick the best option for your needs.
Photo Download Methods at a Glance
| Method | What You Need | Best For | Ease of Use |
|---|---|---|---|
| USB Cable | Camera, official USB cable, computer | Quick, simple transfers without extra gear; great for travel. | Very Easy |
| SD Card Reader | SD card, computer with a slot or an external reader | High-volume shoots, transferring large RAW files, and speed. | Very Easy |
| Wi-Fi / Bluetooth | Wi-Fi-enabled camera, computer or smartphone, manufacturer's app | On-the-go sharing, transferring to mobile devices, and convenience. | Easy |
Each method has its place, and knowing the pros and cons of each will help you build a smooth and efficient workflow for any scenario you find yourself in.
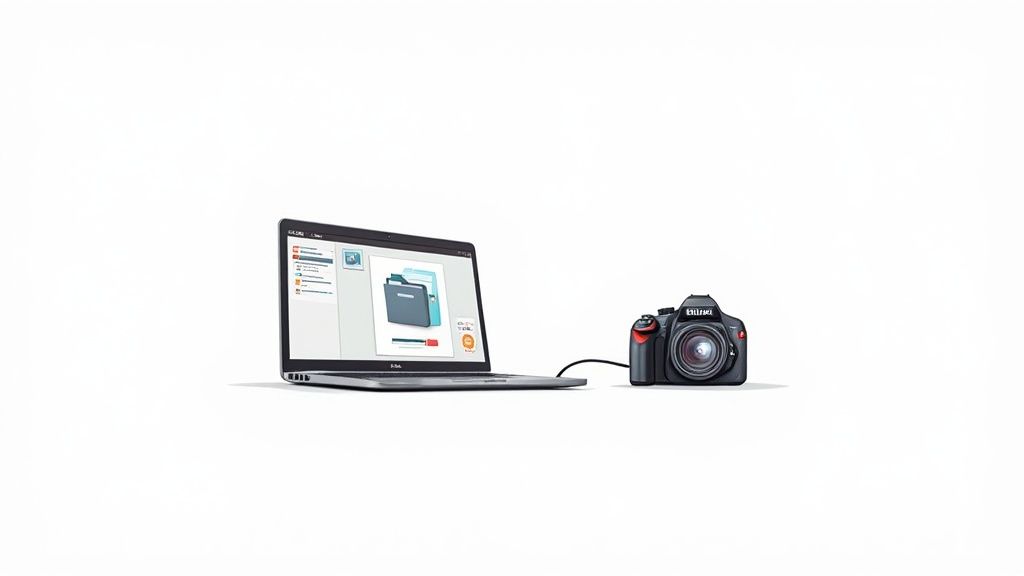
The Direct Connection with a USB Cable
Plugging your camera directly into your computer with a USB cable is the old-school, tried-and-true way to get your photos. It’s a straightforward method that doesn't require any extra gadgets beyond the cable that likely came in your camera box. Think of it as turning your camera into a temporary external hard drive.
Before you even think about plugging anything in, here's a crucial tip I learned the hard way: make sure your camera's battery is fully charged. A direct connection sips power from your camera, and the last thing you want is for it to die mid-transfer. That’s a surefire way to risk corrupting your memory card.
Finding and Copying Your Photos
Once you're connected, your computer should recognize the camera almost immediately. If you're on Windows, it will pop up as a new device in "This PC" or your File Explorer. For Mac users, an icon for the camera will appear right on your desktop or in a Finder window.
From there, you can browse the camera’s memory card just like any other folder on your computer. Your photos will almost always be tucked away in a folder named DCIM (which stands for Digital Camera Images). Inside that, you might see a few subfolders, usually labeled with numbers or the camera brand, where your actual pictures are stored.
Just open those folders up, select the images you want, and copy them over to your computer's hard drive. I always recommend creating a new, clearly named folder for each import (like "Summer Vacation 2024") before you start copying. It makes finding things later so much easier.
Pro Tip: Whatever you do, don't use the "Cut" and "Paste" function to move your photos. Always, always use "Copy" and "Paste" first. This leaves the original files safe on your camera's memory card in case the transfer gets interrupted.
Safely Disconnecting Your Camera
Once all your files are copied over, don't just yank out the USB cable. That's a huge no-no. Suddenly disconnecting the camera can scramble your memory card's file system and lead to lost photos.
Instead, you need to properly eject the device.
- On Windows: Find the camera icon in "This PC" or the system tray, right-click it, and choose "Eject."
- On a Mac: Simply drag the camera's icon from your desktop down to the Trash can, which will magically turn into an Eject symbol.
Wait for the notification telling you it's safe to remove the hardware, then unplug the cable. That extra five seconds is a simple habit that can save your precious memories from disaster. While this method is incredibly reliable, its one downside is that you always need your camera and the right cable handy whenever you want to download pictures from your digital camera.
High Speed Transfers Using an SD Card Reader
When you need to get photos off your camera fast, ditch the USB cable. The professional's choice is a dedicated SD card reader, and for good reason. It is the undisputed champion for speed, especially after a long wedding or a fast-paced event where you’ve shot hundreds, or even thousands, of photos.
The process couldn't be simpler. You just pop the SD card out of your camera and slide it into a card reader that's plugged into your computer. Your machine sees it just like a regular USB flash drive, giving you direct, high-speed access to every single file. Not only is this method way faster, but it also saves your camera's precious battery life for more shooting.
Maximizing Your Transfer Speeds
Here’s a pro tip: not all card readers are created equal. Sure, many laptops have a built-in SD card slot, and that’s convenient in a pinch. But those slots often use slower internal connections. If you want real performance, you need an external USB card reader.
External readers, particularly those that support modern standards like UHS-II, can move massive files in a fraction of the time. This is an absolute game-changer when you're dealing with huge RAW files. RAWs contain so much more data than JPEGs, and they can slow a direct cable transfer down to a painful crawl.
Using an external UHS-II reader can easily cut your import times by more than half compared to a built-in slot or a direct camera connection. For a professional on a tight deadline, that time saved is invaluable.
A Look at How Far We've Come
The speed we take for granted today is pretty remarkable when you think about where digital photography started. Back in the 1960s and 70s, transferring a single, low-resolution digital image could take several seconds—sometimes even minutes! It required bulky magnetic tape and specialized, expensive hardware.
Now, we can transfer thousands of ultra-high-resolution images in that same amount of time, all thanks to the evolution of tiny SD cards and lightning-fast interfaces. You can learn more about the fascinating journey of digital cameras and their early, clunky data transfer methods.
This incredible leap forward makes workflows that were once impossible now completely routine. It’s this efficiency that lets today's photographers manage the mountain of data from a full day's shoot without breaking a sweat.
Wireless Photo Downloads with Wi-Fi and Bluetooth
Forget the cables. Many modern digital cameras now come with built-in Wi-Fi and Bluetooth, which is a total game-changer for getting your photos off the camera. This tech turns your smartphone or computer into a remote hub, letting you download pictures without plugging anything in.
It's perfect for those moments when you need to get a great shot from your camera to your social media feed, like, right now.
The whole process is surprisingly simple. You just turn on the Wi-Fi on your camera, connect it to your phone or home network, and then fire up the manufacturer's app. Brands like Canon, Nikon, and Sony all have free apps (Camera Connect, SnapBridge, and Imaging Edge Mobile, respectively) that let you browse the photos on your memory card and pull them straight to your device.
The Perks and Pitfalls of Going Wireless
The biggest win here is obvious: no more cables. You can be chilling on the couch and grab photos from your camera that's still in its bag across the room. For travelers or anyone who loves an on-the-go workflow, it’s fantastic. Sharing high-quality images instantly becomes a reality.
But, as with most things, it’s not all sunshine and rainbows.
There are a couple of downsides to wireless transfers:
- Battery Drain: Keeping that Wi-Fi signal active is a real power hog. Make sure your camera battery is juiced up before you start a big transfer, or you might find it dead halfway through.
- Slower Speeds: It's great for a handful of JPEGs, but Wi-Fi is painfully slow compared to a card reader when you're moving large batches of photos, especially massive RAW files.
The convenience of today's wireless downloads really stands on the shoulders of decades of innovation. Think back to the standardization of the JPEG format in the early 1990s—that was huge. Its compression made file sizes small enough for the hardware of the time to handle. That, plus the jump from floppy disks to SD cards, paved the way for the speedy, wireless methods we take for granted. You can learn more about the history of digital camera technology to see just how far we've come.
When to Choose a Wireless Transfer
Despite the slower speed, the wireless method is absolutely the best choice in certain situations. It really shines when you just need to get a few choice images onto your phone for a quick edit or share.
Imagine a wedding photographer sending a sneak-peek photo to their phone during the reception to post on Instagram. Or using your phone as a remote live-view screen to compose a shot and trigger the shutter from afar. That's where this feature truly excels.
Ultimately, using Wi-Fi is a trade-off. You're swapping raw speed for pure convenience. For bulk transfers after a big shoot, the trusty card reader is still king. But for those quick, selective downloads where getting the shot out there is the priority, the wireless option is an incredibly useful tool in any photographer’s kit.
A Better Way to Collect Photos from Any Event
Getting your own photos off your camera is one thing. But what about capturing the entire story of an event? After a wedding, you want every candid moment. After a corporate gathering or birthday bash, you want to see the event from everyone's perspective. The old way—chasing people for their pictures—is a headache.
There's an incredibly easy, modern solution.
Instead of trying to pull photos from people, let them push their photos to you—instantly and effortlessly. By using a simple QR code, you can create one seamless, consolidated gallery for the whole event. This is the new standard for easy and complete photo collection.
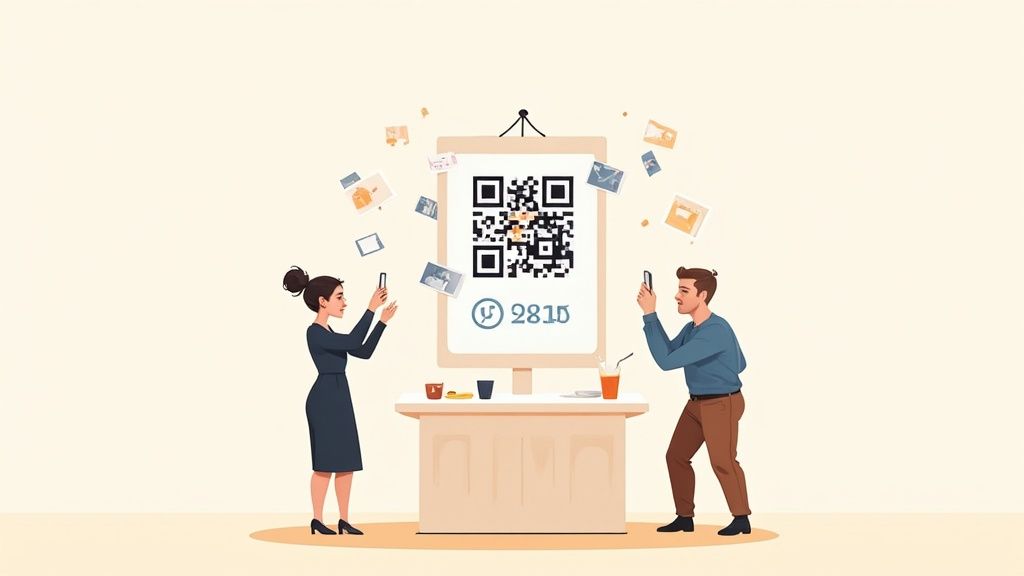
App-Free, Instant Photo Uploads
The beauty of this method lies in its extreme ease of use. Guests simply point their phone's camera at the QR code, tap the link that appears, and can begin uploading photos and videos right away.
The key is that there is absolutely no app to download and no sign-up process. This friction-free approach means everyone, from your tech-savvy friends to older relatives, can contribute their favorite snapshots without any hassle. It's genuinely the easiest way to gather every candid moment and build a complete visual story of your special day.
Perfect for Weddings and Beyond
While this system is a game-changer for weddings, its versatility makes it perfect for any gathering you can imagine. The ease of use and instant consolidation of photos benefit any event where memories are being made.
Imagine how useful this QR code method could be:
- Corporate Gatherings: Effortlessly consolidate photos from team-building days, conferences, and holiday parties into one secure, shared folder.
- Family Reunions: Finally create a complete album that captures memories from every branch of the family tree, all in one place.
- Birthdays & Milestones: Ensure you don't miss a single moment from a big celebration, especially the candid shots you were too busy to capture yourself.
A great practical example is to display your event’s QR code at the venue entrance or on invitations for instant photo uploads. This proactive approach encourages guests to start sharing from the moment they arrive, ensuring you capture the entire experience seamlessly.
This modern approach centralizes every memory, saving you hours of post-event hassle. Once the photos are collected, you can explore the best digital photo album software to beautifully display and share the complete, crowdsourced collection. It transforms photo collection from a chore into a seamless, fun part of the event itself.
How to Organize and Protect Your Photos
Getting your photos off the camera is just the first hurdle. Without a solid plan, your ever-growing collection of memories can spiral into digital chaos pretty fast. The only way to keep your precious images safe and easy to find for years to come is to have a simple, effective system for organizing and backing them up.
This doesn't have to be some complicated, time-sucking chore. In fact, the best systems are the ones you can actually stick with. It all begins with giving your photos a logical home the second they hit your computer.
Create a Smart Folder Structure
One of the most straightforward and effective ways I’ve found to organize photos is simply by date. This creates a predictable, chronological archive that you can navigate intuitively.
I recommend setting up a nested folder structure that looks something like this:
- 2024 (The main folder for the year)
- 2024-01 January (A subfolder for the month)
- 2024-01-15_Family_Hike (A specific folder for the event)
- 2024-02 February
- 2024-02-10_Corporate_Event
- 2024-01 January (A subfolder for the month)
This system keeps everything incredibly tidy and searchable. You can always track down what you’re looking for just by remembering roughly when you took the photos, which is often way easier than recalling a specific file name. For a deeper dive, check out our complete guide on https://www.wedpicsqr.com/blog/how-to-organize-digital-photos.
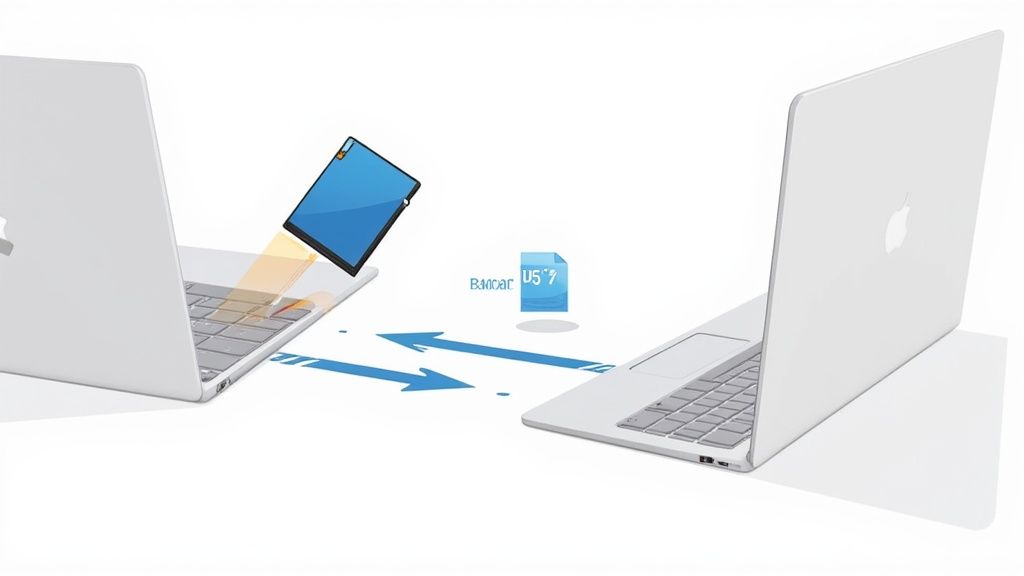
Implement the 3-2-1 Backup Rule
Listen, hardware fails. Laptops get stolen. Accidents happen. A single copy of your photos living on one computer is just a disaster waiting to strike. The absolute gold standard for protecting your images is the 3-2-1 backup rule.
The 3-2-1 Rule is simple: Keep three total copies of your data, store them on two different types of media, and keep at least one copy off-site.
So, what does that look like in the real world? It could mean keeping your main photo library on your computer's hard drive, a second copy on an external hard drive you keep at your desk, and a third copy with a cloud storage service. This redundancy is your safety net, ensuring that even if your computer and external drive both fail, your memories are still safe and sound in the cloud.
With the sheer volume of photos we all take now, this is more critical than ever. It's estimated that people worldwide take roughly 1.6 trillion photos every single year. This explosion in picture-taking has pushed storage and transfer technology forward in big ways, even leading to new formats that can slash storage costs by up to 60%.
Once your pictures are safely transferred, don't stop there. Put a good system in place for managing your digital archives. You can find some great tips for organizing your photo collection to help keep everything in order from day one.
Common Photo Transfer Questions
After you've downloaded pictures from your camera a few times, you get into a groove. But even seasoned photographers run into the same handful of frustrating snags. Here are the quick answers to the most common questions that pop up.
Why Won’t My Computer Recognize My Camera?
This is a classic. You plug in your camera, ready to see your shots, and… nothing happens. It’s a frustrating moment, but the fix is usually simple.
First things first, check the obvious: Is your camera actually powered on? Does it have enough battery? If that’s all good, the next culprit is almost always the connection itself.
- The Cable: Try using the official USB cable that came with your camera. Not all cables are created equal, and some third-party ones just don’t play nice.
- The Port: Plug the cable into a different USB port on your computer. Sometimes a port can be finicky.
- Camera Settings: Dive into your camera’s menu and look for something called "USB Connection Mode." You want to make sure it's set to "Mass Storage" or "MSC." This tells your computer to treat the camera like a regular external drive, making it easy to access your files.
If you’ve tried all that and are still stuck, head over to your camera manufacturer's website. You might need to install a specific driver for your computer to talk to your camera properly.
Is a Card Reader Better Than a USB Cable?
For most situations? Absolutely, yes. A dedicated SD card reader is a game-changer, especially if you shoot a lot.
The biggest advantage is speed. Transferring hundreds of massive RAW files is significantly faster with a good card reader. It also saves your camera's battery, so it’s fully charged and ready for your next shoot instead of being tethered to your computer.
That said, a USB cable is a perfectly reliable backup. It's fantastic for travel or for those times you just need to get a few photos off your camera without digging out extra hardware.
Can I Download Photos Directly to an External Drive?
You bet, and honestly, it’s a great habit to get into. Doing this saves precious space on your computer's internal drive and kicks off your backup process right away.
When you connect your camera or pop in your SD card, your computer sees it just like any other drive. Just open the DCIM folder on your camera/card, select the photos you want to move, and then drag-and-drop (or copy-paste) them straight into a folder on your external hard drive.
This is a core part of a smart backup strategy. And speaking of backups, once your photos are safely on that external drive, you should also look into the best free cloud storage for photos to create that essential second copy of your memories.
For any event—from weddings to corporate gatherings—make collecting photos from your guests just as simple. With WedPicsQR, guests can scan a QR code and instantly upload their photos to a shared gallery, no app required. Create your free event gallery today at https://www.wedpicsqr.com.