How to Export Multiple Photos from Lightroom Fast
When you're staring at hundreds, or even thousands, of photos after a big event, the last thing you want to do is export them one by one. The good news is you don’t have to. The fastest way to export a whole batch of photos from Lightroom Classic is by using the Grid View inside the Library Module.
A single keyboard shortcut—Cmd+A on a Mac or Ctrl+A on a PC—selects every single image in your folder or collection. From there, just hit the "Export" button. This simple move can turn a daunting, hours-long task into a few clicks.
The Fastest Way to Batch Export Photos
After a wedding, a corporate event, or a big family reunion, your hard drive is probably packed. Getting those images ready for a client, printing them out, or uploading them to a shared gallery like WedPicsQR needs to be efficient. Nobody has time to export files individually.
Imagine you just finished shooting a wedding. You’ve got your professionally edited shots ready to go, and maybe you've even collected a bunch of candid photos from guests through a simple QR code. Your next step is to get all these memories out of Lightroom and into a single, accessible place. This is where a quick batch export saves the day, seamlessly consolidating every captured moment.
Selecting Your Entire Gallery Instantly
The secret to this speed lies in Lightroom Classic’s Library Module, specifically in Grid View. This view lays out all your photos as thumbnails, which is perfect for getting a bird's-eye view and selecting everything at once.
Here’s the breakdown:
- First, make sure you’re in the Library Module.
- Then, switch over to Grid View. You can do this quickly by pressing the 'G' key on your keyboard.
- Finally, press Ctrl+A (on Windows) or Cmd+A (on Mac). Just like that, every photo in your current view is selected.
This one command is a massive time-saver. For a wedding photographer delivering 500 final images, this cuts the export prep time down by more than 90%. You're not clicking through hundreds of files; you're just telling Lightroom, "grab everything."
Before you export, make sure you've already gone through and selected only your best shots. A solid photo culling process is the most important step to ensure you're not exporting duplicates or subpar images.
This simple workflow is all about efficiency.
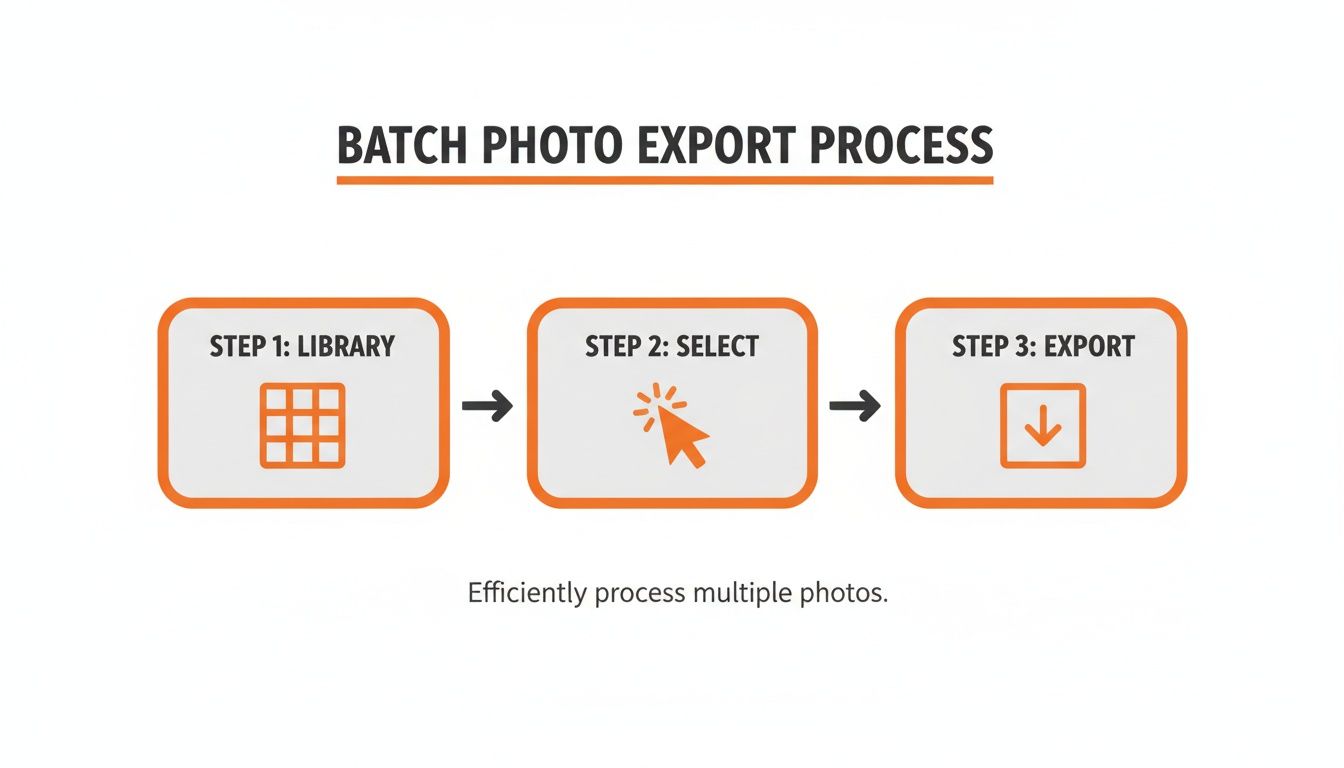
As the diagram shows, you start in the Library, make your selection, and then move straight to the export dialog. It’s a direct path that eliminates any unnecessary steps. Once all your photos are highlighted, you're ready to dive into the Export settings where you can fine-tune everything from file names to image quality.
Nail Your Export Settings for Perfect Results
Okay, you've picked your favorite shots and hit "Export." Now you're staring at the Export Dialog box—this is the mission control for your final photos. Getting these settings dialed in is the secret sauce to making sure your images look fantastic wherever they end up. It’s a crucial step, especially when you need to export multiple photos from Lightroom at once.
First things first, let's talk about naming. A smart naming strategy is your best defense against a folder full of chaos. Ditch the default camera filenames like _DSC1234.jpg and create a custom template. I find that a simple 'EventName_Date_Sequence' format (like 'Smith-Wedding_2024-10-26_001') works wonders. It makes your photos instantly searchable and keeps everything tidy, whether it's for a client gallery or your own archive.
Choosing the Right File Format
The file format you choose has a massive impact on both quality and how the photos can be used. For pretty much any kind of online photo sharing, JPEG is your go-to. It strikes that perfect balance between solid quality and a small file size, which is exactly what you want for web galleries.
This is a huge deal for platforms that count on guests uploading photos quickly and easily. When you display your event’s QR code at the venue entrance or on invitations for instant photo uploads, the last thing you want is for people to get stuck waiting for huge files to upload—no app required. JPEGs keep things zippy without anyone noticing a drop in quality on their phone screen.
- JPEG: This is the universal choice for the web, email, and social media. Use it anytime file size is a factor.
- PNG: Perfect for images that need a transparent background, like logos or watermarks. Newer versions of Lightroom also let you use PNG for High Dynamic Range (HDR) photos, which is great for capturing extra detail in the highlights and shadows.
- TIFF: This is your high-quality, lossless format for professional printing. If you need to preserve every last pixel of data for a huge print or for archival purposes, TIFF is the way to go.
If you’re trying to figure out the absolute best format for your big day, we have a whole guide that breaks down the pros and cons: https://www.wedpicsqr.com/blog/jpeg-vs-png-best-format-for-wedding-photos.
Mastering Image Sizing and Quality
Next up, you'll see the Image Sizing and File Settings panels. This is where you set the final dimensions and compression for your exported photos. Don't let it intimidate you; it's pretty straightforward.
For a web gallery, a great rule of thumb is to resize the long edge of your photos to about 2048 pixels. This keeps the file size nice and small for fast loading times but still leaves plenty of sharpness for most modern screens.
The quality slider for JPEGs is another key setting. I usually find that a value between 75-80 hits the sweet spot, giving you a great-looking image without a bloated file size.
When your photos are destined for print, getting the colors right is everything. For truly perfect results, taking some time for mastering color management in printing is a must. It ensures the vibrant colors you see on your screen translate beautifully to paper.
These settings are your best friend for managing everything from a small birthday party gallery to a massive corporate event. By tailoring your export settings for the final destination, you guarantee every single photo looks its absolute best, no matter where it’s being viewed.
Using Export Presets to Automate Your Workflow
If you export photos more than once, you need presets. Seriously. They're the single biggest time-saver in Lightroom, and once you start using them, you'll wonder how you ever lived without them.
Think of presets as custom recipes for your exports. They remember everything: file type, size, quality, where the photos should go, and even if you want a watermark. This turns the chore of exporting batches of photos from a tedious, click-heavy process into a one-and-done deal.
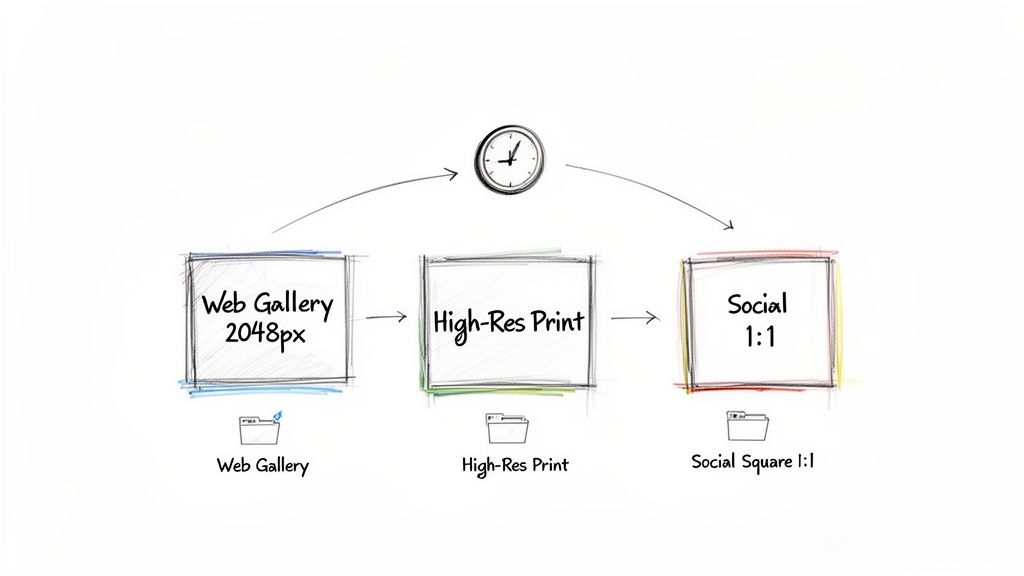
Imagine you just wrapped a wedding shoot. You need high-res JPEGs for the couple's album, smaller web-sized versions for a gallery like WedPicsQR, and maybe some square-cropped images for your Instagram feed. Instead of manually exporting three separate times, you can build a preset for each one and fire them all off at once.
This kind of automation is a lifesaver for any event photographer, whether you're shooting corporate headshots or a family reunion. It keeps your output consistent and hands you back a massive chunk of your time.
Creating Your First 'Web Gallery' Preset
Let’s walk through building a genuinely useful preset—one for a web gallery. This is the kind of thing you'll use constantly for sharing images with clients or guests after an event. The goal here is to create photos that are small enough to load fast but still look tack-sharp on any screen.
Here are the settings I use for a go-to 'Web Gallery' preset:
- File Format: Stick with JPEG. It’s the universal standard for a reason, offering the best mix of quality and file size.
- Color Space: Set this to sRGB. It's the standard for every web browser and mobile device out there, ensuring your colors look right for everyone.
- Image Sizing: Tick the "Resize to Fit" box and choose "Long Edge." I find 2048 pixels is the sweet spot for modern displays.
- Output Sharpening: Check "Sharpen For" and pick Screen with the "Amount" set to "Standard." This adds that final bit of crispness that makes photos pop online.
- Export Location: Always choose a specific folder. Something like "Client Web Galleries" keeps your exports from becoming a chaotic mess.
Once you have all that dialed in, just click the "Add" button on the bottom left of the Export dialog. Give it a memorable name, and boom—it's saved and ready to use forever. For a deeper dive into workflow improvements, check out our beginner's guide to wedding photo editing software.
The Power of Multi-Batch Exporting
Ready for the ultimate efficiency hack? Lightroom Classic’s Multi-Batch Export is an absolute game-changer. This feature lets you run several different presets on the same group of photos at the same time.
With a single click, you can generate an entire wedding gallery in multiple formats—web-ready JPEGs for the online gallery and high-resolution TIFFs for the couple's print album. This can easily save you up to 75% of your time compared to exporting each batch one by one. It’s no surprise that 95% of professional photographers lean on presets to maintain consistency across all their deliveries.
By automating your exports with presets, you move from being a photo editor to a workflow manager. This shift frees you up to focus on what truly matters—capturing and sharing incredible moments.
Exporting on the Go with Lightroom Mobile
Your photo workflow shouldn’t be chained to a desk. The Lightroom mobile app brings some serious editing and exporting power right to your phone or tablet, letting you finalize and share images from pretty much anywhere. This is a total game-changer for event hosts who want to share a sneak peek of the fun while the party is still going strong.
Knowing how to export multiple photos from Lightroom on your mobile device is incredibly simple. Just open an album, tap and hold on one photo to kick off selection mode, and then tap any other images you want to batch together. It’s an intuitive process that just feels right on a touchscreen.

Once your photos are selected, just hit the Share icon. This pops up the mobile export options, giving you all the crucial controls right from your device.
Mobile Export Settings for Instant Sharing
The mobile export screen is a bit more streamlined than the desktop version, but it still gives you the core controls you need for high-quality results. You can quickly get professional-looking images ready for any platform, from social media to a shared event gallery like WedPicsQR. This simplicity is perfect for events like weddings, birthdays, or corporate gatherings.
Imagine guests are uploading fantastic candid shots to your event’s gallery all night long using a simple QR code—no app needed. With the Lightroom app, you can quickly edit a few favorites and share them back to the gallery or up on a projector screen in real-time. This instant feedback loop makes the photo-sharing experience way more interactive and fun for everyone. To see just how easy mobile album sharing can be, check out our guide on how to share a photo album on an iPhone.
Here are the key settings you'll want to tweak:
- File Type: You'll see options for JPG, DNG, or the Original file. For sharing online, JPG is almost always the right call.
- Dimensions: You can choose from a few pre-set sizes or punch in a custom dimension to fit exactly what you need.
- Image Quality: A simple slider lets you adjust the JPEG compression. I've found that a setting around 80% is a great sweet spot between quality and file size on mobile.
The real power of mobile exporting is its immediacy. You can go from editing a photo on your tablet to sharing it with hundreds of event guests in a matter of seconds.
Seamlessly Sharing Event Memories
The beauty of a tool like WedPicsQR is its seamless, app-free experience for guests. They just scan a QR code to upload photos instantly. Your mobile workflow should feel just as effortless. After exporting photos from Lightroom to your camera roll, you can immediately add them to your event's consolidated album.
This is a lifesaver for multi-day events like conferences or family reunions. You can collate, edit, and share highlights from each day without ever cracking open a laptop. Display your event’s QR code at the venue entrance or on invitations for instant photo uploads, and you can manage the entire collection right from the palm of your hand. This keeps the memories flowing and ensures every moment gets captured and shared without delay.
Pro Tips to Seriously Speed Up Your Export Workflow
Beyond just presets and batch selections, a few small tweaks to your workflow can make a massive difference in how fast you get photos out of Lightroom. These are the little habits that, once you build them, save you a surprising amount of time on every single project, letting you move from editing to exporting without breaking your creative flow.
One of the slickest moves is to export directly from the Filmstrip while you're still in the Develop Module. Forget about toggling back to the Library. Just make your final tweaks, select the images you need right there in the filmstrip at the bottom, and right-click to export. This keeps your editing rhythm going without a single hiccup.
Nail Your Folder Organization from the Start
A smart folder system isn't just nice to have; it's essential for a fast, sane workflow. Before you even think about hitting that export button, create a clear, dedicated destination for your files.
For anyone managing events and using a tool like WedPicsQR, here’s a game-changing tip: set up an export folder on your computer that syncs directly with a cloud service like Dropbox or Google Drive.
This one tiny step makes uploading photos to your event gallery practically automatic. The second Lightroom finishes exporting, your cloud service gets to work syncing them. While it's primarily known for weddings, this seamless system is incredibly versatile, perfect for birthdays, corporate gatherings, and reunions.
The real goal here is to eliminate as many manual steps as you can. Automating the handoff from Lightroom to its final destination—like a cloud-synced folder—is one of the most powerful speed boosts you can give your process.
Another pro move is to use post-processing actions. In the Export Dialog box, look for the "Post-Processing" section. You can tell Lightroom what to do after it saves the files. A common one is to have the exported photos automatically open in another program, like Photoshop for some final retouching or just your computer's photo viewer for a quick quality check.
The Filmstrip Advantage for Live Events
When you're in the thick of a fast-paced event, the Filmstrip View in Lightroom Classic becomes your best friend for getting multiple photos out the door. As you're working in the Develop Module, your selections are already highlighted in the filmstrip below. Just right-click any of them, hit Export, and fire away with your favorite preset.
Imagine you're at a family reunion and have collected over 800 guest photos through a simple QR code. You can quickly edit your top picks and then batch export them with 95% more efficiency than if you were messing with individual files.
Just set the destination folder to your WedPicsQR upload directory, choose a format like PNG for those beautiful HDR wedding candids, and resize everything to 3000px on the long edge for print-ready albums. This method is so effective that it's practically standard practice among professional event photographers. For a deeper dive, you can find a ton of great info from photography experts online, like this guide on advanced Lightroom exporting on zenithclipping.com.
Got Questions About Exporting Photos in Lightroom? I’ve Got Answers.
Even the smoothest Lightroom workflow can hit a snag. Exporting seems simple, but a few small settings can make a huge difference. I get these questions all the time, so let’s clear up the common sticking points you might face when you’re learning how to export multiple photos from Lightroom.
“Why Do My Photos Look… Off After Exporting?”
This is the big one. Your photos look perfect inside Lightroom, but the exported files seem dull, soft, or just plain wrong. It’s a super common frustration, and it almost always comes down to a few key settings in that Export Dialog box.
First, if the quality looks a bit muddy, your JPEG compression is the likely culprit. For anything going online, a quality setting of 75-80 is the sweet spot. It keeps file sizes manageable for fast uploads to an event gallery without sacrificing too much detail. But for prints? Crank that slider all the way up to 100. You want every pixel of detail you can get.
If the colors look weird, you’re probably looking at a color space issue. For any screen—laptops, phones, tablets—you need to use sRGB. It's the universal standard for the web. If you export in a different color space, browsers won't interpret the colors correctly, and your beautifully edited photos will look washed out to everyone else.
“Can I Export My Photos With All My Edits and My Watermark?”
Yes, and this is where Lightroom really shines. Every single adjustment you make in the Develop Module—from your basic exposure tweaks to that fancy new color grade you perfected—gets baked right into the exported file. Lightroom’s whole process is non-destructive, meaning your original files stay safe and untouched while the exported copies get all the glory.
Adding your watermark is just as straightforward. In the Export Dialog, just scroll down to the “Watermarking” section and tick the box. You can create a simple text watermark right there or use a custom graphic you’ve already designed (a PNG file with a transparent background works best). This is non-negotiable for branding your work before it goes into a shared gallery.
My biggest time-saving tip: Create export presets that already include your watermark. I have different presets for different types of jobs—some with a watermark, some without. Applying it becomes a one-click affair instead of a chore.
“What’s the Best Way to Export Photos for an Event Gallery?”
For any modern event gallery, especially one using a QR code for guests to add their own photos, the game is all about speed and mobile experience. Your goal is to get those images from your camera to their phones as quickly and beautifully as possible. This is where a dedicated export preset is no longer a nice-to-have; it's essential.
You need to build a preset specifically optimized for web and mobile viewing. Here’s my go-to recipe for a perfect "Web Gallery" preset:
- File Format: Always JPEG. It’s the universal language of the internet.
- Resize to Fit: Set the Long Edge to 2048 pixels. This is plenty big for any phone screen and keeps file sizes tiny.
- Quality: Slide it down to 80. Trust me, the difference between 80 and 100 is invisible on a small screen, but the file size difference is huge.
- Output Sharpening: Check the box and sharpen for Screen at a Standard amount. This adds a final bit of crispness that makes photos pop on displays.
With these settings, your photos will load instantly for guests, giving them a fantastic experience without waiting around. If you display your event’s QR code at the venue entrance or on invitations for instant photo uploads, a fast-loading gallery is the key to getting everyone involved.
Ready to make photo sharing at your next event effortless? With WedPicsQR, you can create a beautiful, private gallery in minutes. Guests scan a QR code to upload photos instantly—no app needed. Try WedPicsQR for free and start collecting every memory today.