The Best Way to Store Photos and Preserve Your Memories
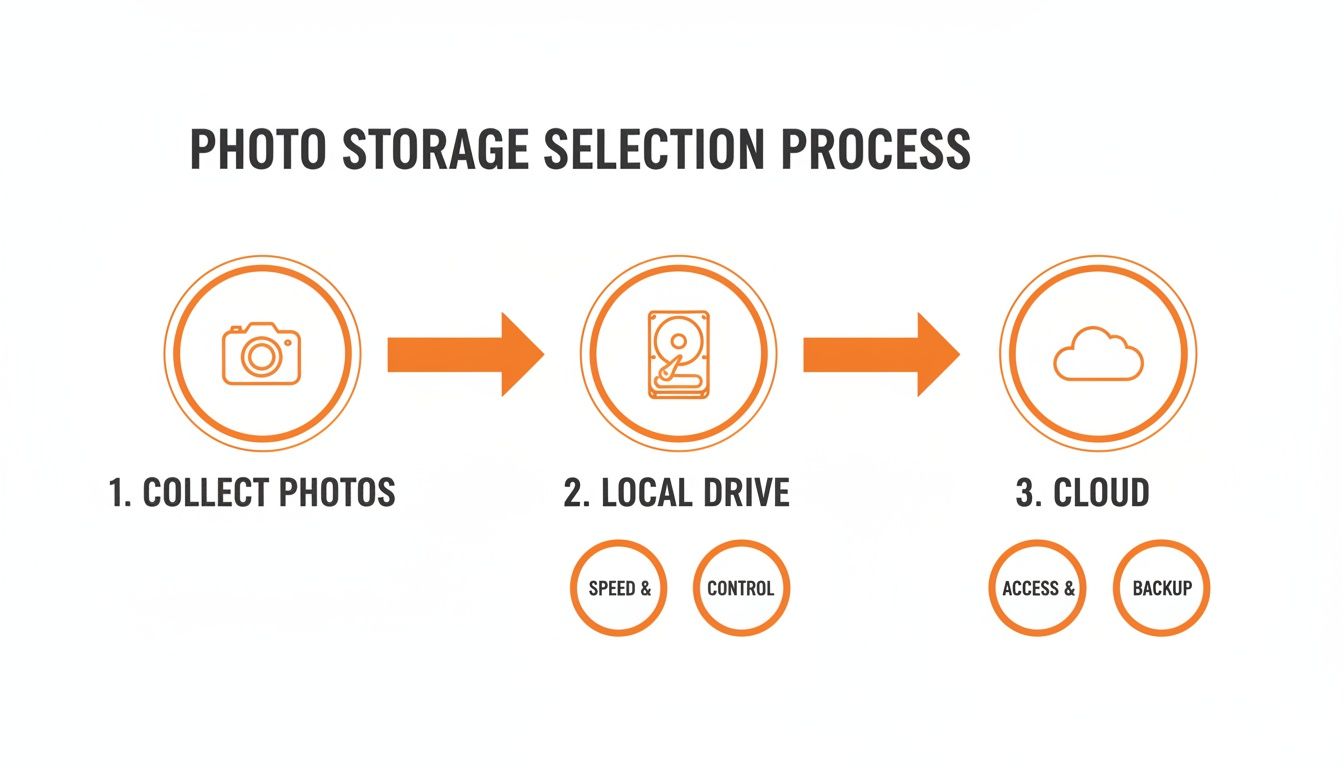
The secret to bulletproof photo storage? Don’t put all your eggs in one basket. The best approach is a hybrid one, mixing the speed of local drives with the safety of cloud storage.
This whole strategy is built on a simple, industry-standard idea called the 3-2-1 backup rule. It’s pretty straightforward: keep three copies of your photos on two different types of storage, with at least one copy kept off-site. Trust me, this little framework is the gold standard for protecting memories you can never get back.
Building a Modern Photo Storage Strategy
Think about it—your photos aren't just files. They're the irreplaceable moments of your life, from wedding days and a baby's first steps to those candid family get-togethers. Just keeping them on your phone or laptop is a massive gamble. A single hard drive failure, an accidental "delete all," or a disaster like a fire could wipe out your entire visual history in a blink.
That’s why you need a real storage strategy, not just a folder on your desktop.
The heart of any solid plan is diversification. You shouldn't have to pick between a fast external drive and a secure cloud service. The smartest move is to use both, getting the best of each. For a really deep dive into building a system that lasts, check out this ultimate guide to preserving digital and print memories.
The Power of a Hybrid Approach
When you go hybrid, you're eliminating single points of failure. It’s like having multiple layers of defense for your most cherished memories.
Here’s how it breaks down:
-
Local Storage (Your Physical Copy): This is your external hard drive (HDD) or solid-state drive (SSD). These give you blazing-fast access to your full-resolution photos, no internet required. This is your main, tangible archive—the one you physically own and control.
-
Cloud Storage (Your Off-Site Copy): Services like Google Photos, Dropbox, or Amazon Photos act as your secure, remote backup. This copy is safe from local disasters like theft or flooding, and it lets you pull up and share your photos from anywhere on the planet.
This one-two punch of local and cloud storage perfectly nails the 3-2-1 rule. Your computer has the first copy, your external drive has the second (on different media), and the cloud gives you the third (safely off-site). It’s a powerful setup that keeps your photos safe, accessible, and ready for whatever comes next.
Blending local and cloud solutions creates a system where convenience doesn’t come at the cost of security. It’s the definitive way to make sure your photos survive tech failures and are still around for future generations to enjoy.
Why This Strategy Works
Adopting this method shifts your mindset from just saving photos to actively preserving them. The peace of mind you get from knowing your memories are protected in multiple locations is honestly priceless.
It’s a proactive step that safeguards your legacy, turning what feels like a huge, overwhelming task into a secure and manageable process. If you're ready to get started, our guide on the best ways to store digital photos can help you build this bulletproof system from the ground up.
The First Step: Collecting Every Moment Seamlessly

Before you can organize, back up, or archive a single image, you have to actually get all the photos in one place. This is the crucial first step most people completely overlook, especially after a big event. A solid photo storage strategy begins the moment the pictures are taken, not weeks later when you're trying to piece everything together.
For events like weddings, the old ways of collecting photos are notoriously broken. You end up chasing guests through text messages, scouring social media for blurry hashtagged pictures, or creating shared folders that half your guests ignore. This post-event headache means countless amazing, candid moments are lost forever on someone else's phone.
A Modern Fix for Instant Collection
Now, imagine a different scenario. What if you could display your event’s QR code at the venue entrance or on invitations for instant photo uploads? Guests just scan the code with their phone's camera, and it takes them straight to a private, elegant upload page. The best part? There is no app to download and no account to create, ensuring ultimate ease of use.
This simple QR code process removes all the usual friction, making it effortless for everyone—from your teenage cousins to your grandparents—to add their favorite shots in real time. This is the whole idea behind a platform like WedPicsQR, which is built to seamlessly consolidate memories without the hassle.
This approach is a total game-changer, with a primary focus on weddings where hundreds of guests are snapping pictures. Instead of scattered memories, you get a complete, unified gallery filled with every laugh, dance, and heartfelt moment from dozens of different perspectives.
The best way to store photos from a major life event is to make sure you actually collect all of them first. An easy, app-free QR code system guarantees you won't miss a single candid shot, creating a richer, more complete story of your day.
The sheer volume of photos taken today makes this initial collection step more critical than ever. Smartphones are responsible for a staggering 92.5% of all pictures captured worldwide, and the average person has nearly 2,800 photos on their device. Leaving collection to chance is a recipe for lost memories. A QR code system solves this problem by centralizing every photo into one private gallery right from the start. You can dive deeper into these trends with these photo sharing platform insights.
When it comes to gathering photos from a crowd, the difference between old and new methods is stark. Traditional ways are often clunky and yield poor results, while a dedicated QR platform makes the process effortless for everyone involved.
Comparing Event Photo Collection Methods
| Feature | Traditional Methods (Email, Social Media) | QR Code Platform (WedPicsQR) |
|---|---|---|
| Guest Effort | High: find hashtags, create accounts, attach files | Low: just scan and upload |
| Ease of Use | Confusing for less tech-savvy guests | Intuitive for all ages; no app needed |
| Success Rate | Low; many photos are never shared | High; friction-free process encourages sharing |
| Photo Quality | Often compressed or low-resolution | Original high-resolution files are preserved |
| Privacy | Public or difficult to control | Private, password-protected gallery |
| Organization | Messy; photos scattered across platforms | Centralized in one organized album |
Ultimately, a QR code system is built for one job: getting every possible photo from your event into your hands with zero fuss for your guests.
Beyond Weddings: Versatility for Any Event
While this QR code method is a perfect fit for weddings, its versatility makes it an outstanding solution for a huge range of gatherings. The principle of easy, instant photo collection applies to any occasion where multiple people are taking pictures.
Consider these practical examples:
- Corporate Gatherings: Put QR codes on conference tables or presentation slides to collect photos from team-building events, holiday parties, or product launches.
- Birthdays: Add the QR code to digital invitations or a welcome sign at the entrance to create a collaborative album from a milestone celebration.
- Reunions: Make sure every branch of the family can contribute their photos to a single gallery that everyone can enjoy afterward.
By starting with a simple, effective collection method, you build a strong foundation for your entire photo storage workflow. You get a far more complete set of memories and skip the most frustrating part of post-event cleanup, setting yourself up for easy backups and long-term preservation.
Choosing Your Storage Foundation: Cloud vs. Local Drives
Now that you've gathered all your event photos, you've got a big decision to make: where will they live permanently? This choice is the bedrock of your entire photo preservation plan, and it really comes down to two main players: local drives and cloud services. Figuring out the right mix is the key to keeping your photos safe and accessible.
Local storage, like an external hard drive (HDD) or a zippier solid-state drive (SSD), is the physical copy you hold in your hand. You buy it once, you own it. It’s lightning-fast for editing huge files and you don't need an internet connection, giving you total control. But with that control comes the heavy responsibility of keeping it safe from damage, theft, or just plain misplacing it.
The Case for Cloud Storage
On the other side of the coin, you have cloud storage. This is where you pay a service to keep your photos on their massive, secure servers. The biggest win here is access. You can get to your photos from any device, anywhere, which makes sharing with family and friends ridiculously easy.
Most cloud platforms also automate your backups, syncing new photos from your phone or computer without you even thinking about it.
The real magic of the cloud, though, is off-site protection. If your local drive gives up the ghost or a disaster hits your home, your photos in the cloud are completely untouched. That peace of mind is huge.
This isn't an either/or battle. The smartest strategy is a hybrid one, combining the physical security and one-time cost of a local drive with the automated, anywhere-access of the cloud. This way, your memories are both safe and always within reach.
Making an Informed Decision
Let's be real: relying only on local drives is a risky game these days. We're creating photos at an insane rate. Globally, a staggering 1.8 trillion photos are snapped each year, most of them on our phones. This explosion of images has made storage a real headache, with 46% of professional photographers calling archiving a top concern.
Younger generations, especially those between 25-44, are leaning heavily into cloud solutions. Why? Because they can scale forever and handle massive high-resolution files, making them a fantastic option for long-term preservation.
When you're weighing your options, think about these key points:
- Cost: A local drive is a one-time purchase. Cloud services are usually a subscription. Do the math—what’s the long-term cost of that subscription versus buying a new drive every few years?
- Convenience: The cloud wins on convenience, hands down. Automated syncing and universal access are hard to beat. Local drives require you to manually back things up and have the drive with you.
- Security: With a local drive, security is 100% on you. With the cloud, you're placing your trust in a company's security systems and privacy policies. The debate over Cloud Storage vs Local Storage shows both have their own security pros and cons.
Finding your perfect balance is what matters. A great hybrid approach might be using a large external hard drive for your main, full-resolution archive, while using a cloud service to sync your favorite JPEGs for quick sharing. This way, you’re never dependent on a single point of failure.
For a deep dive into the top players, check out our guide on the best free cloud storage for photos to see which service is the right fit for you.
Building Your Bulletproof Photo Workflow
A plan is just a plan until you put it into practice. This is where the rubber meets the road—where we build a real, practical system for organizing and backing up every single memory. We're going to turn what feels like a chore into a simple, automated habit. The best way to store photos, after all, is the one you’ll actually stick with.
The bedrock of any solid photo system is a logical folder structure. Honestly, a simple chronological approach is almost always the most effective. It's intuitive, it's clean, and it's future-proof.
Start with a main folder named “Photos,” then create subfolders for each year. Inside each year, make folders for specific events using a consistent format like YYYY_MM_EventName.
For example:
Photos/2024/2024_05_Smith_WeddingPhotos/2024/2024_08_Family_Reunion
This setup makes finding images ridiculously easy, whether you’re searching for a specific wedding or just want to browse through a particular year.
Setting Up Your Automated System
With your folders sorted, it's time for the magic: automation. This is how you make the 3-2-1 backup rule a true "set-it-and-forget-it" process. You'll need software that can automatically sync a folder you designate to both your local external drive and your cloud service of choice.
Plenty of tools can handle this, from features built right into your operating system to specialized backup apps. If you're looking for ideas, you can dig into some of the best photo organization software out there today.
The key is to point the software to your main "Photos" folder. Once it’s configured, any new folder you add—like that complete wedding gallery—gets copied to your other backup spots without you lifting a finger.
This whole process flow is about moving photos from collection to their final, safe destinations.
As you can see, the workflow kicks off with collecting the photos, which then branches out to both local and cloud backups for total protection.
A Real-World Example: Putting It All Together
Let's walk through a real scenario. Your wedding was a massive success, and thanks to a slick QR code system, you now have a gallery with hundreds of photos from all your guests.
Here's how simple the process is:
- Download Everything: You log into your private gallery and download the entire collection as a single zipped file.
- Organize and Drop: On your computer, you create a new folder—something like
2024_09_Our_Wedding—and pop all the downloaded photos inside. - Trigger the Automation: You move this new folder into your main
Photos/2024directory. And... that's it. Your backup software sees the new files and automatically starts syncing them to your external hard drive and your cloud account.
Your work is done in minutes. Without you doing anything else, you now have three secure copies of your wedding photos, perfectly following the 3-2-1 rule. That's the power of a well-designed, automated workflow.
Archiving Your Photos for Future Generations
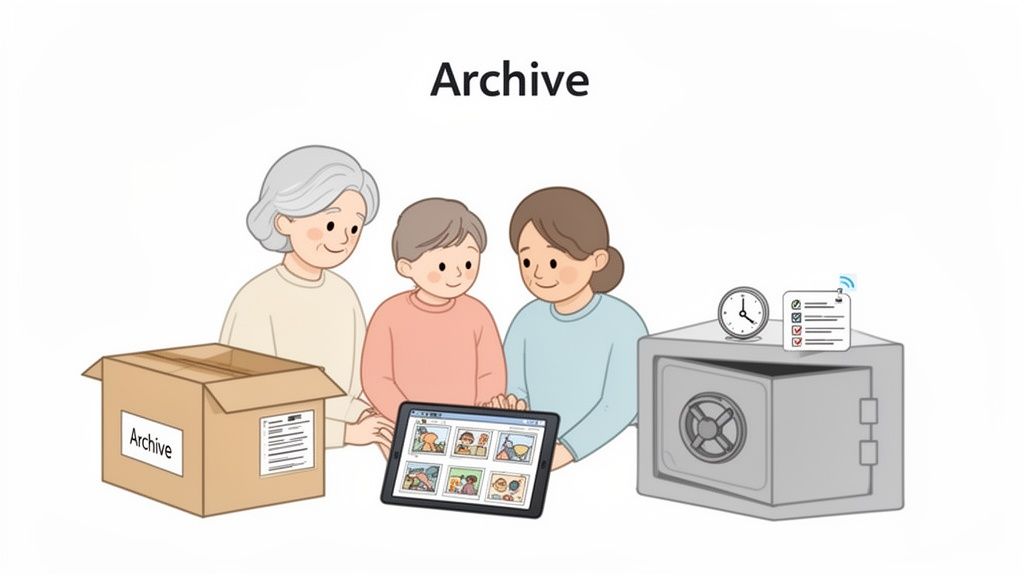
True photo storage is about more than just backups—it's about preservation. While a solid backup plan protects your images today, archiving is what makes them findable, viewable, and meaningful for your kids, grandkids, and beyond. This is the final, crucial step in building a photographic legacy that actually lasts.
Archiving is a long-term game. It forces you to think about how technology and file types will change over time. It’s about picking the right formats, adding context to your images, and creating a simple plan so your loved ones can one day access these memories without a headache.
Choosing the Right File Formats
Your first big decision is what format to save your most important photos in. This choice directly impacts both quality and future accessibility. Let's be clear: not all file types are created equal for long-term storage.
-
RAW Files: Think of these as the digital equivalent of a film negative. They contain all the original, uncompressed data straight from the camera's sensor. You should absolutely keep the RAW files for your most important shots—professional wedding photos, milestone portraits—because they offer maximum editing flexibility down the road.
-
High-Quality JPEGs: For the vast majority of your photos, a high-quality JPEG is the perfect balance. They take up way less space than RAW files, are universally compatible with pretty much any device on the planet, and still hold excellent visual detail for viewing and printing.
A good, practical approach is to archive the final, edited JPEGs of all your cherished photos. Then, only keep the original RAW files for that top tier of "can't-lose" images.
The Power of Metadata: Your Digital Story
A photo of a wedding without names or dates is just a pretty picture. But a photo tagged with "Grandma & Grandpa's First Dance - May 2024" becomes a priceless piece of family history. That’s the power of metadata.
Metadata is just the information embedded within a photo file, like:
- Names of people in the photo
- The event or location
- The date it was taken
- Keywords or tags (e.g., "family reunion," "birthday party," "summer vacation")
Most photo organization software makes it easy to add this info. Seriously, taking the time now to tag your most important images makes them searchable for future generations. Imagine them finding a specific moment or person with a simple search.
Your archive isn't just a collection of files; it's a library of stories. By adding metadata, you're providing the context that gives each image its true meaning, ensuring those stories can be understood decades from now.
Creating a Digital Inheritance Plan
Finally, your meticulously organized archive is only useful if someone can actually get into it. A digital inheritance plan is a simple, non-legal document that ensures your family can find and unlock your photo collection when you're no longer around to help.
This plan should include:
- The physical location of your hard drives (e.g., "in the grey box in the office safe").
- Login credentials for your cloud storage accounts.
- Simple instructions on how to navigate your folder structure.
Store this information securely with your other important documents, like your will. It's also a good idea to check on your archive drives once a year to make sure the files haven't become corrupted over time. This little bit of effort completes the mission, ensuring your memories remain intact and accessible for generations to come.
Common Questions About Storing Your Photos
When it comes to protecting your photos for the long haul, a few key questions pop up again and again. Getting these right is the difference between a secure archive and a digital disaster waiting to happen. Let's tackle the big ones.
How Many Photo Backups Do I Really Need?
For the photos you absolutely can't afford to lose—think wedding pictures, first baby steps, milestone events—the answer is the 3-2-1 rule. It’s the gold standard for a reason.
Here’s how it works: you keep three total copies of your precious files. Those copies live on two different types of media (like your computer's drive and an external drive), and crucially, one of those copies is kept off-site.
A real-world example? One copy on your laptop, a second on a portable SSD you keep in a desk drawer, and a third in a cloud service like Google Photos. This setup protects you from everything from a hard drive crash to a house fire.
Is Cloud Storage Alone Safe Enough for My Photos?
Cloud storage is fantastic for accessibility and as that critical off-site backup, but putting all your eggs in that one basket is risky. You're essentially renting space, not owning it.
Services can change their pricing, accounts can get locked or hacked, and in a worst-case scenario, the company could go out of business. It's rare, but it happens.
The smart play is always a hybrid approach. Use the cloud for what it’s great at—syncing across devices and providing an off-site safety net. But always, always maintain a local backup on an external drive that you physically own and control. That way, you have ultimate authority over at least one copy of your memories.
The easiest and most successful way to get photos from guests at any event is to remove all friction. A simple, app-free QR code platform ensures everyone can contribute their pictures in seconds, leading to a much more complete and authentic collection of memories.
What Is the Easiest Way to Get Photos from Guests at an Event?
Hands down, the best way is a QR code system that doesn't require an app download. While its primary focus is on weddings, this versatile method is perfect for any gathering—birthdays, corporate parties, reunions, and more.
You just display a unique QR code at the event—a great practical example is on tables, invitations, or a sign by the entrance. Guests scan it with their phone's camera, and it instantly opens a private upload page in their browser.
They can drop their photos right in, and you get a complete, seamless consolidation of every moment without having to text, email, or chase anyone down for their pictures afterward. It’s simple, immediate, and incredibly easy to use.
For your next event, ensure you capture every memory effortlessly. With WedPicsQR, you can create a beautiful, private gallery and a unique QR code in minutes, allowing guests to upload photos instantly with zero fuss. Start creating your free gallery today!